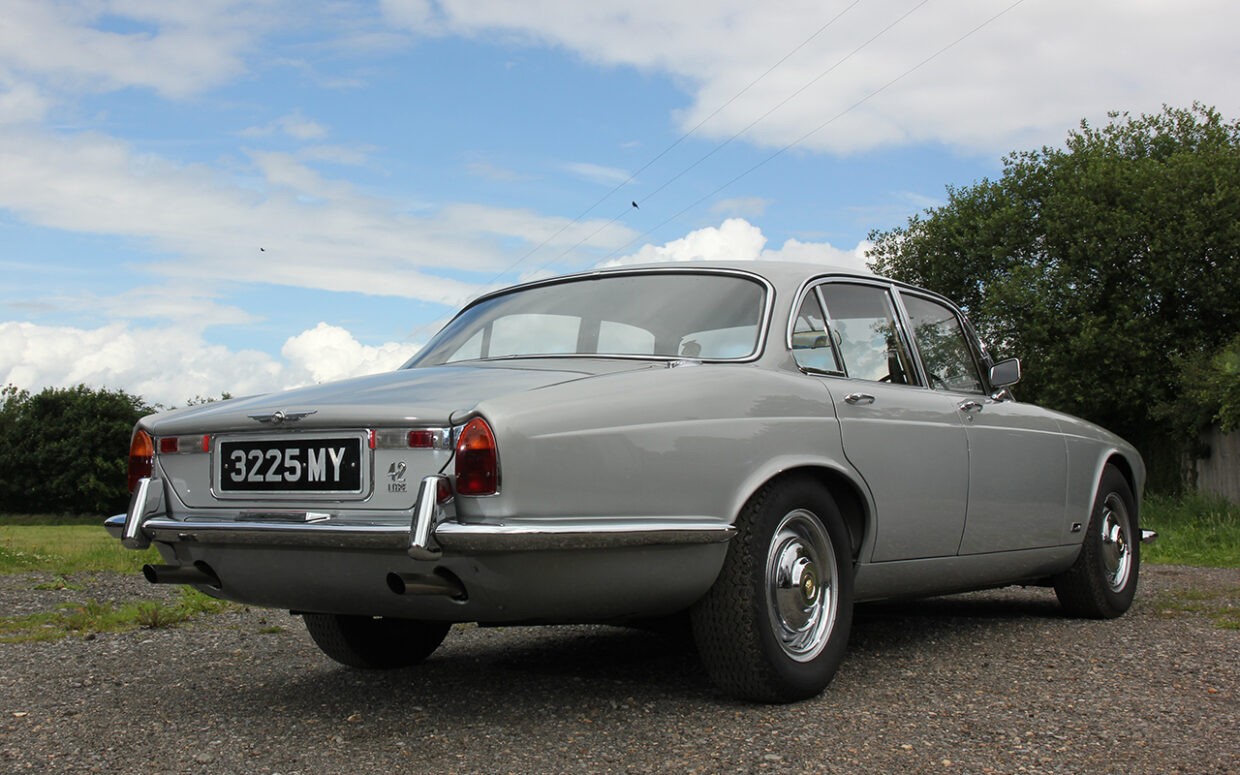
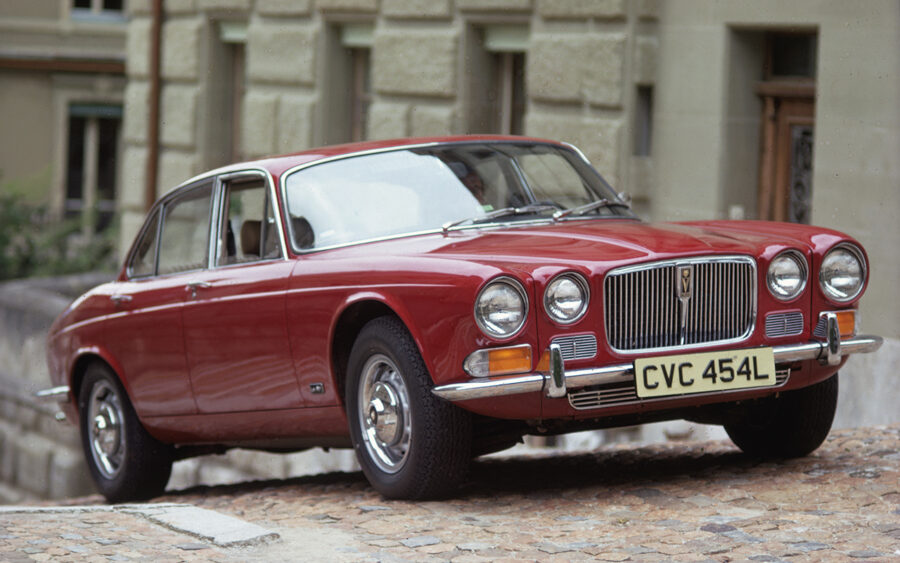
The Jaguar XJ Series 1 set the ball rolling for the brand’s long-lived, multi-talented mid-sized luxury saloon
Words: Rob Hawkins
The most successful of Jaguar’s saloon cars began life in October 1968 with the arrival of the XJ6, a new model intended to eventually replace every other saloon in the range. It was a roaring success, delighting press and customers alike with its handsome styling, poised handling and gutsy engine. It was clearly a A total of 13,729 XJs were sold in 1969 alone – more than twice the number of 420G examples sold during that model’s entire four-year career.
Motoring journalist were convinced the XJ6 was a game-changer for Jaguar, with Autocar commenting: “If Jaguar were to double the price of the XJ6 and bill it as the best car in the world, we would be right behind them. As it stands at the moment, dynamically, it has no equal regardless of price.”
It’s easy to see what made the XJ6 so appealing. The suspension was bang up to date, with an independent set-up both front and rear featuring modern coil springs and dampers; the steering was power-assisted; the brakes were servo-assisted and featured discs all round, and the proportions of the bodywork were perfect. All of this combined to make a sporty luxury saloon that was huge fun to drive, yet quiet and comfortable at the same time.
Compared with the old 420G, the XJ6 was a modestly proportioned executive saloon, although four inches were added to its wheelbase in 1972 (as an optional extra), taking its overall length from 189.5 to 194.75 inches; additional rear legroom was an obvious advantage, but the shorter-wheelbase model remained on sale for those who didn’t need the extra space. Then in July of the same year, Jaguar offered the XJ with the 5,343cc V12 engine that had already debuted in the E-type Series 3, giving the company a super-refined new flagship – badged as either the Jaguar XJ12 or Daimler Double-Six.
The original XJ range remained in production through to 1973, with the subsequent Series II featuring a number of cosmetic upgrades, including a revised interior and electrics, a shallower grille, larger bumper air intakes and a raised bumper line. Despite just a five-year career, what we now know as the Series I range enjoyed impressive sales, with 1971 seeing a whopping 27,517 examples produced (including the Daimler versions). By the following year, production had reached 650 car per week, and 900 more workers were recruited to help boost that figure closer to 1000 via the introduction of additional nightshifts.

Bodywork
If you’re tempted to take the plunge, one of your biggest Series 1 XJ concerns will be the state of its bodywork and structure. With an all-steel monocoque, the common areas for corrosion include the sills, wheelarches, door bottoms, chassis legs, crossmembers and floors, making it essential that you check all such areas for signs of rot and previous poor-quality repairs. Just because Series I prices have risen dramatically in recent years doesn’t mean there aren’t poorly restored cars out there, which means that every panel needs checking for rust, filler and less-than-impressive paintwork.
Specialists such as David Manners and SNG Barratt stock a wide range of repair panels to address many of these issues, with up-to-date prices on their websites. Budget for around £450 for a replacement outer sill, while wheelarch repair panels generally cost around £30. A front lower valance comes in at about £200 and an outer front door skin costs about £150, or around £350 for a rear door skin. Should the floor be in poor condition, replacement panels cost about £130 each.
There are also lots of smaller repair panels available, ranging from mounting panels for the radiator and toe boards to crossmembers and chassis leg repair sections. Prices vary, but large items appear to cost in the region of £100, whereas smaller items – such as sill closing panels – are inevitably cheaper. Many large bodywork items are available too, including bonnets at around £900, while you should budget up to £500 for a door (front or rear) and £400 for a rear wing (cheaper repair sections are available). A new steel front wing might set you back £1200 plus, while a glassfibre replacement (less than ideal, we admit) is likely to be around £350.
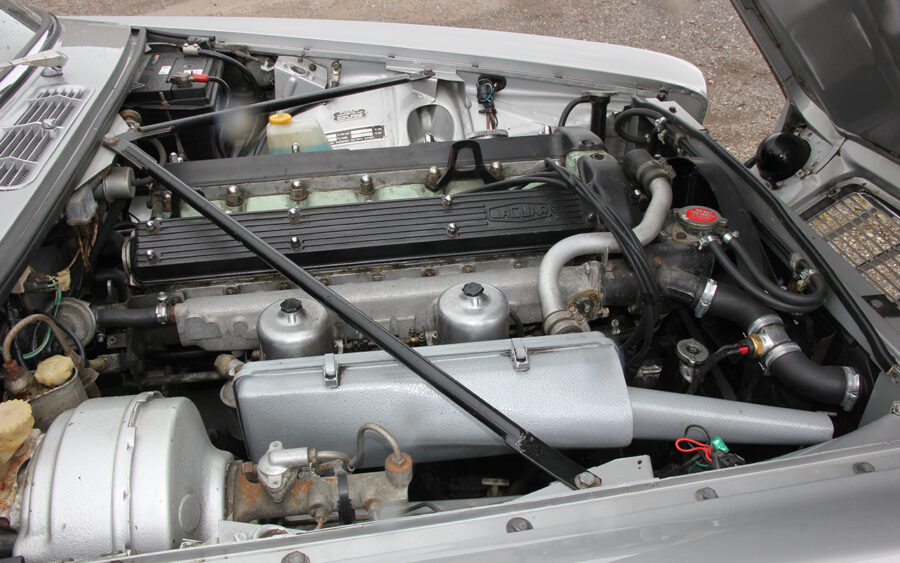
Engine and transmission
The majority of XJ Series 1 models are powered by an XK engine with a Borg-Warner three-speed automatic gearbox. The fairly wheezy 2.8-litre in the entry-level XJ6 does a reasonable job, but most owners prefer the appeal of the more powerful 4.2-litre, which was available from the start of production and had already been proven in the Jaguar 420; the 3.4-litre XJ6 didn’t come along until the arrival of the Series II. Both Series I XK engines are fuelled via a pair of SU carburettors, while the 5,343cc V12 features a quartet of Stromberg items.
Classic Jaguar specialist Ken Jenkins stresses the importance of using the correct blue-coloured coolant, replacing it every two years and conducting an engine flush at the same time. If not, old antifreeze can cause corrosion, a build-up of silt inside the engine, blockages, overheating and potential head gasket failure. Jenkins also recommends using a good quality engine oil, such as those from Morris or Millers; for the XK engines he recommends a 20W-50 semi-synthetic, whereas for the V12 he prefers a 15W-50 semi-synthetic or mineral oil instead of the more commonly available 20W-50, the advantage being improved oil circulation, particularly when the engine is cold.
When viewing a prospective purchase, ask to see evidence of servicing, including oil changes and coolant renewal. Even if the vehicle has covered only a few hundred miles per year, it’s essential that oil changes are conducted annually. Poor maintenance can certainly result in simple engine jobs turning into a nightmare; for example, if the spark plugs have been over-tightened or not removed for a long time, they can be difficult to extract and pose a risk of stripping the threads in the aluminium cylinder head.
The V12 engine’s ignition should be equipped with a Lucas Oscillating Pick-Up System (OPUS), with the Series I XJ12 in particular featuring the OPUS AB3 system, which includes an ignition amplifier. According to Ken Jenkins, a poor earth connection is often the main cause of problems with this set-up. Replacement parts are scarce, but the more modern Lucas Constant Energy System can be fitted instead, although it requires some machining of the standard distributor.
The XK and V12’s timing chains run from the crankshaft up to the camshafts (to two cylinder heads for the V12). If the timing chain is particularly noisy, it may be necessary to replace the entire assembly (tensioner, chain and guides). This can be completed on all engines, but requires a partial strip-down. Ken Jenkins warns that on the V12, should the engine be manually turned anti-clockwise, the timing chain tensioner’s spring blade can be broken, in which case it will need to be replaced to avoid further damage. On the XK straight-six, there’s a brass cone filter behind the tensioner, which often gets clogged up and should be replaced. He also recommends using a genuine Jaguar tensioner.
A rope oil seal is fitted as standard on the back of the crankshaft to form the rear main seal on the XK and V12 powerplants. This can dry out, especially if the car isn’t frequently run, resulting in oil leaking from the rear of the engine. And if the dried-out seal starts to rub, excessive heat build-up can potentially result in engine failure. A later lip seal can be fitted instead, which avoids these problems.
The main gearbox mount, located from underneath the vehicle, can perish and split but remains seemingly intact by being squashed by the weight of the gearbox. It comprises a coil spring and two pieces of rubber, which are fitted to a steel mount. New components are available to overhaul the mount and ensure the gearbox is securely fitted.

Suspension, steering and brakes
With disc brakes all round, the front outboard items feature three-piston calipers that were also fitted to the 420 and cost around £100 to replace (exchange refurbished). Should you want to retain your old brake calipers, then budget for around £20–70 for a seal kit and £20–35 for a piston. Front brake pads cost around £20 a set and discs can be as little as £20–50 each, so if the front brakes are seized or problematic on a car that’s for sale, a new set of front discs, pads and calipers isn’t going to be a deal breaker.
The rear brakes, however, are a different story. Although parts prices are similar to the fronts, access is much more difficult because the rear brake assemblies are inboard. They can be accessed from underneath the rear of the vehicle, but a ramp or inspection pit is essential. For a thorough overhaul, it may be better to remove the rear subframe assembly, which not only takes time but will probably also lead to more repairs involving the suspension, driveshafts/diff and hidden bodywork.
The handbrake operates the rear brakes, so check that it works properly, especially on an XJ with an automatic gearbox where many owners rely upon Park to prevent the vehicle moving. If any problems are identified with the handbrake, don’t assume they will be easy to fix and don’t accept the excuse that it doesn’t matter because the vehicle is MoT exempt (we never recommend avoiding the annual MoT test in favour of exemption). Check whether the brakes have been routinely serviced and whether the brake fluid has been renewed every two or three years; even if the vehicle has rarely been used, the brake fluid (it should be DOT 4) will absorb moisture, which can result in internal corrosion of the pipework and pistons.
Suspension wear and tear is just as common on the Series I XJ as most other Jaguars. It’s the price you pay for superior ride quality, so listen out for knocks and rattles during a test drive. If possible, lever a pry bar against any suspension bushes or mounts to check for play. Waggle each raised road wheel to check for wheel bearing and bush play. A small amount of play in the wheel bearings is to be expected, especially on the front. As for the rear, play may be down to movement in the driveshaft’s universal joints – waggle a raised wheel from side to side to check the wheel bearing. Most replacement parts are reasonably priced.
Series I parts can often be cheap, but there are two points to note here. Firstly, look at the full price range of parts to help determine whether cheap is best. Secondly, if you cannot complete a repair yourself, then the labour time involved may be more expensive than the parts being fitted. Replacing a front wheel bearing, for example, requires the hub assembly to be removed, and so the labour costs are much greater than the cost of the parts.
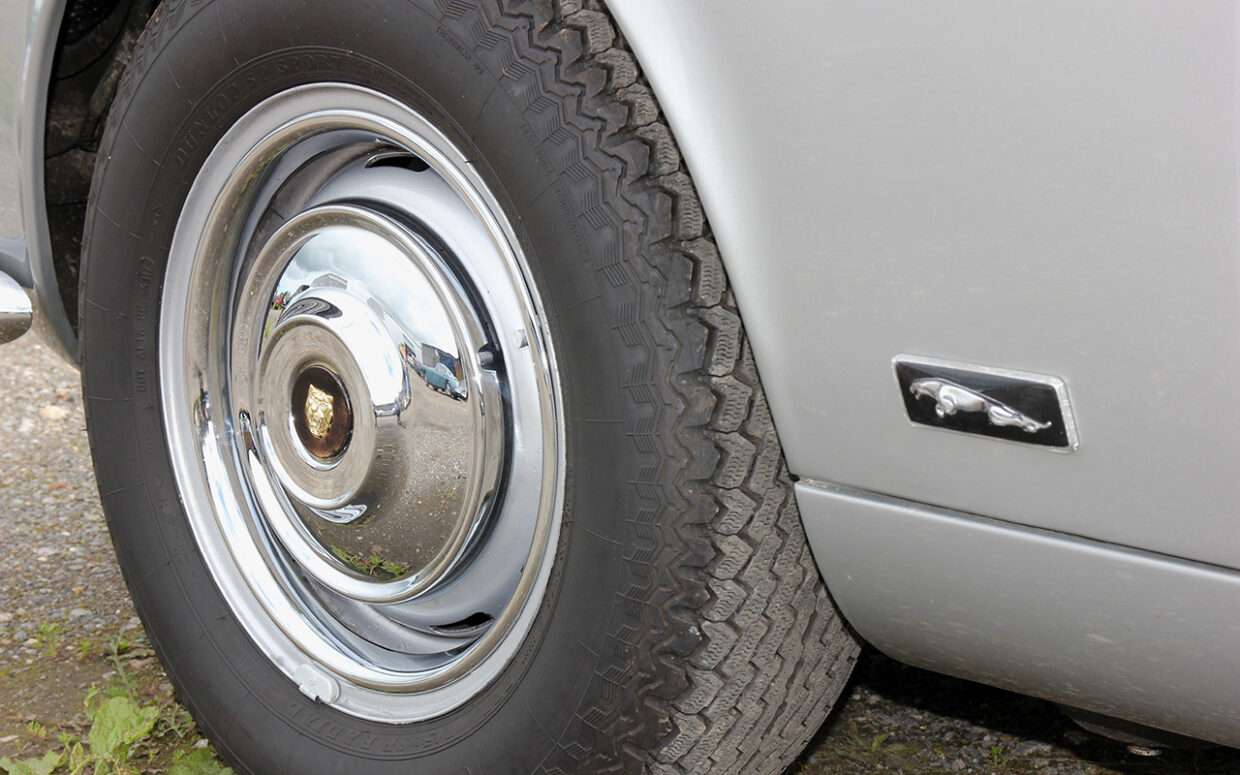
All Series I XJs came equipped with 15-inch wheels as standard, but many have since been changed for a different size and/or width. Dunlop designed a tyre for the Series I, which is classified as the ER/70 VR15. The width of this tyre is 202mm and is pricey at around £280 per corner. When inspecting the tyres on a prospective purchase, assuming the tread is in good condition, look for a four-digit date stamp on the sidewall to indicate the year of manufacture; regardless of use and condition, if the date stamp on the sidewall of a tyre indicates it’s more than seven years old, it should be replaced.
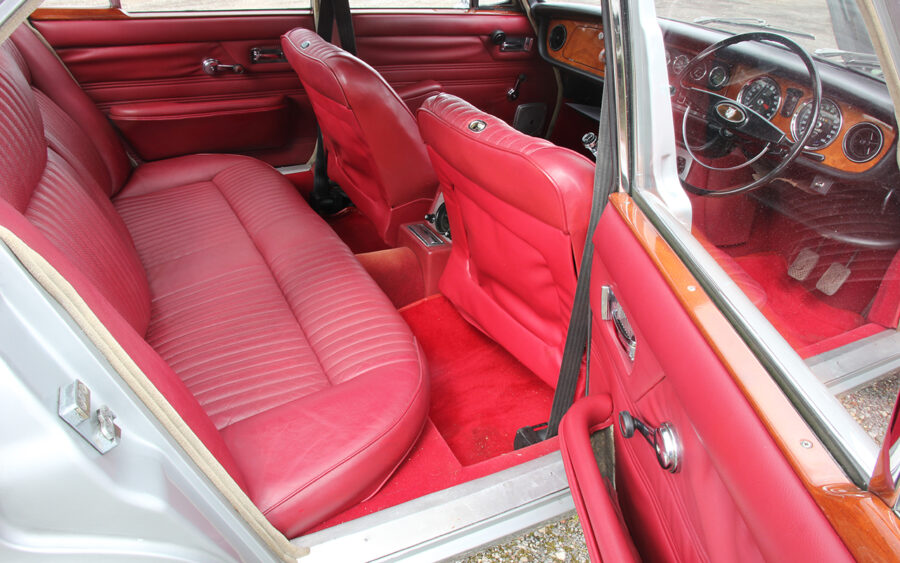
Interior and trim
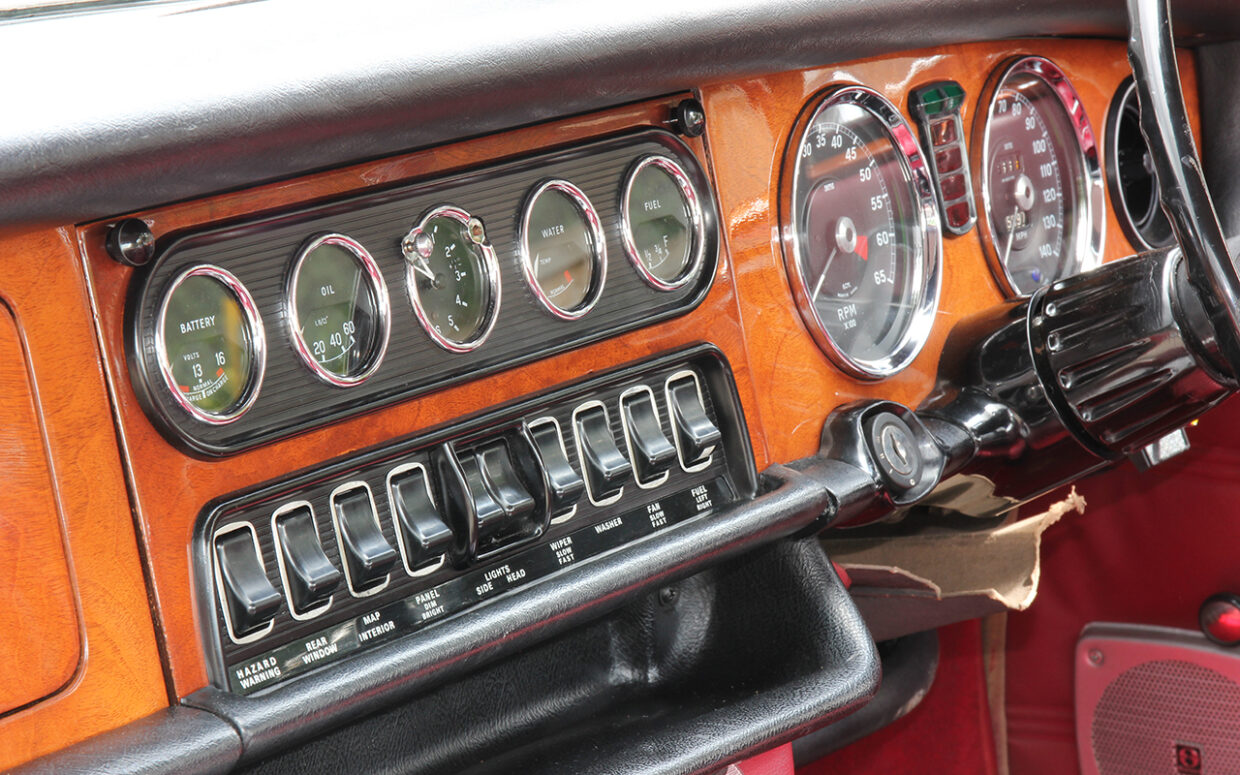
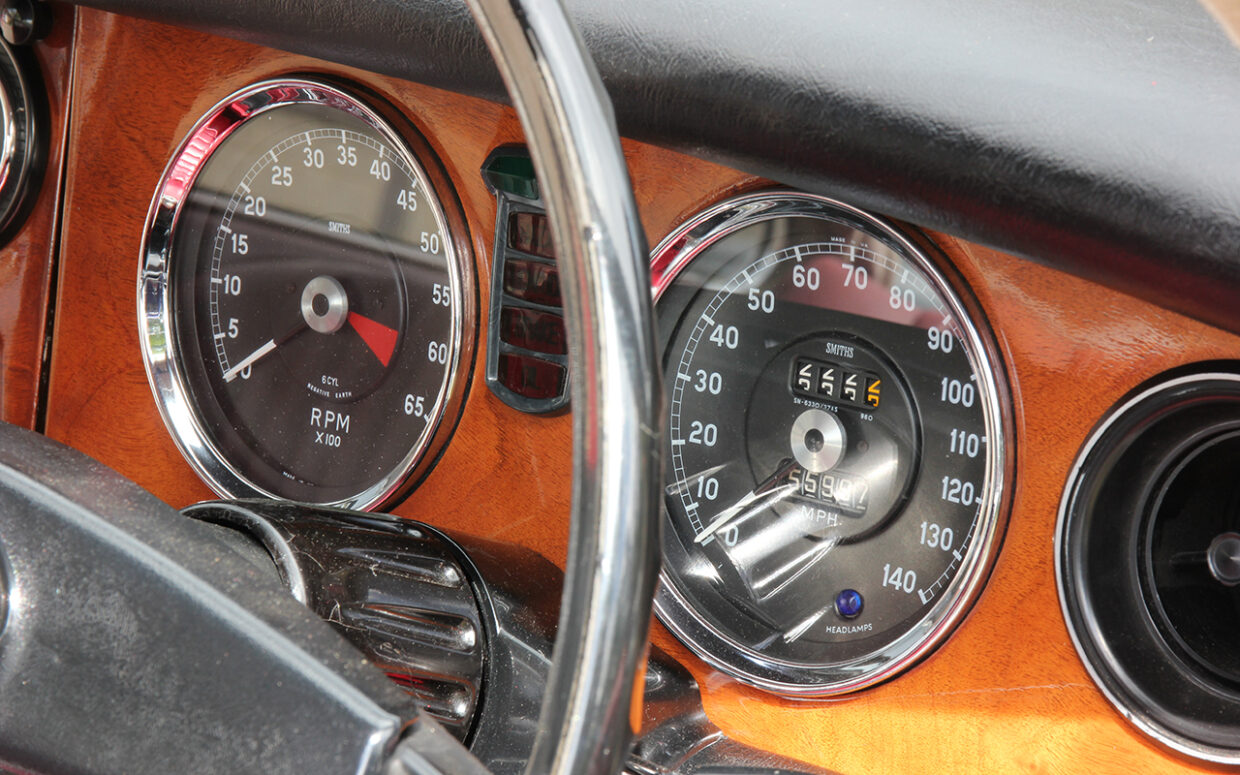
With sofa-sized seating and ample legroom (especially in the long-wheelbase models), it’s easy to see why the XJ was a huge hit during the late 1960s and early 70s. Both cloth and leather upholstery were offered, with matching door cards and a veneer-covered dashboard housing an assortment of Smiths gauges. Check the condition of the upholstery, looking for cracks in the leather, colour blemishes and worn material. Specialists can supply new seat covers, headrest covers and new foam for the front seat bases, backs and headrests. A pair of leather front seat covers cost around £1,000, while new foam ranges from just over £60 for a pair of headrests to less than £160 for a pair of seat bases. Trimmed door panels are also available, as are carpets and headlining.
When inspecting any XJ Series 1, test all the gauges to ensure they are working. In most cases, they can either be repaired or replaced; specialists such as Speedy Cables can inspect, quote and repair a faulty speedometer, allowing you to retain the original unit.
Check the condition of the veneer dashboard from a number of angles, looking for cracks and discolouring; it can be restored, but it’s quite an undertaking to remove, strip and refurbish it. Feel around the carpets for traces of water and damp, sometimes caused by crushed door seals but often the result of bodywork issues, such as rot around the windscreen or holes in the floor.
Look inside the boot and remove the spare wheel and any carpeting to help look for water leaks and corrosion. There are twin fuel tanks, each one mounted inside the rear inner wing area, so look around the sides of them for corrosion and water. New boot trim is available but can be expensive.
Jaguar XJ Series 1: our verdict
These days, the Jaguar XJ Series I remains one of the rarer members of the XJ line-up, and also also one of the most sought after – which inevitably means it’s an expensive choice for today’s XJ aficionado. The higher bar to entry may put some buyers off – not least because later models can be just as appealing for less initial outlay – but there’s much to be said for the S1’s combination of simple mechanicals, sleek styling, hand-made luxury and excellent parts and specialist support.
For many only the very best example will do, but there are plenty of down-and-out examples available for much less than a pristine show car; with a budget for rejuvination and some patience, an XJ Series 1 can make a fairly approachable project car. Watch out for rust, buy on condition rather than age or mileage and you should be set for many years of sumptuous motoring.